Once, I decided to clean up my Blogger blog. I deleted a few outdated posts, thinking they no longer served any purpose.
Within two to three days, I noticed a significant drop in my blog traffic. Panic set in. What had I done wrong?
After some research, I realized that by deleting those posts without setting up proper redirects, I had created broken links. Visitors clicking on old links were landing on 404 error pages.
That’s when I understood the importance of learning how to set redirection in Blogger.
In this post, I’ll share my journey of discovering the importance of redirects, the steps I took to implement them, and tips to avoid common mistakes.
Whether you’re a beginner or have been blogging for a while, this guide will help you maintain your blog’s SEO health and keep your readers engaged.
What Is Redirection and Why Is It Important?
Before diving into the steps, let’s understand what redirection means.
Redirection is the process of forwarding one URL to another. In the context of Blogger, it means directing visitors from an old or broken URL to a new, active one.
Why Should You Learn to Set Redirection in Blogger?
1. Maintain SEO Rankings: Redirects help preserve your search engine rankings by ensuring that link equity is passed from old URLs to new ones.
2. Enhance User Experience: Visitors won’t encounter 404 errors, leading to a smoother browsing experience.
3. Prevent Loss of Traffic: Proper redirects ensure that you don’t lose traffic from backlinks pointing to old URLs.
4. Facilitate Site Restructuring: If you’re reorganizing your blog or changing post URLs, redirects help maintain continuity.
Types of Redirections in Blogger (And When to Use)
When I first learned to set redirection in Blogger, I thought all redirects were the same. But soon, I discovered there are different types of redirects — each with its own purpose. Understanding these helped me avoid big SEO mistakes and improved my blog’s structure.
Let me tell you to do it one by one in the simplest possible way:
1. 301 Redirect (Permanent Redirect): A 301 redirect tells search engines that a page has moved permanently to a new location. It also passes almost all SEO value from the old URL to the new one.
2. 302 Redirect (Temporary Redirect): A 302 redirect means a page is moved temporarily, but it will be back soon.
3. Meta Refresh Redirect: A meta refresh is a type of redirect set inside the HTML of a page, rather than from the server or dashboard.
4. JavaScript Redirect: This redirect uses a simple script to redirect a visitor.
| Redirections | When to Use? |
|---|---|
| 301 Redirect (Permanent) | Merging or replacing blog posts |
| 302 Redirect (Temporary) | Temporary testing or page move |
| Meta Refresh Redirect | Redirecting to an external site |
| JavaScript Redirect | Conditional or behavior-based redirect |
Note: Blogger doesn’t natively support 302 redirects through its dashboard. You’d need to use JavaScript or meta tags if needed, but it’s rare.
Redirect Chains in Blogger
When I first started fixing my blog links, I didn’t realize that I was accidentally creating something called a redirect chain. It took me some days to figure out why my blog got slower and why some posts weren’t getting indexed properly.
What Is a Redirect Chain?
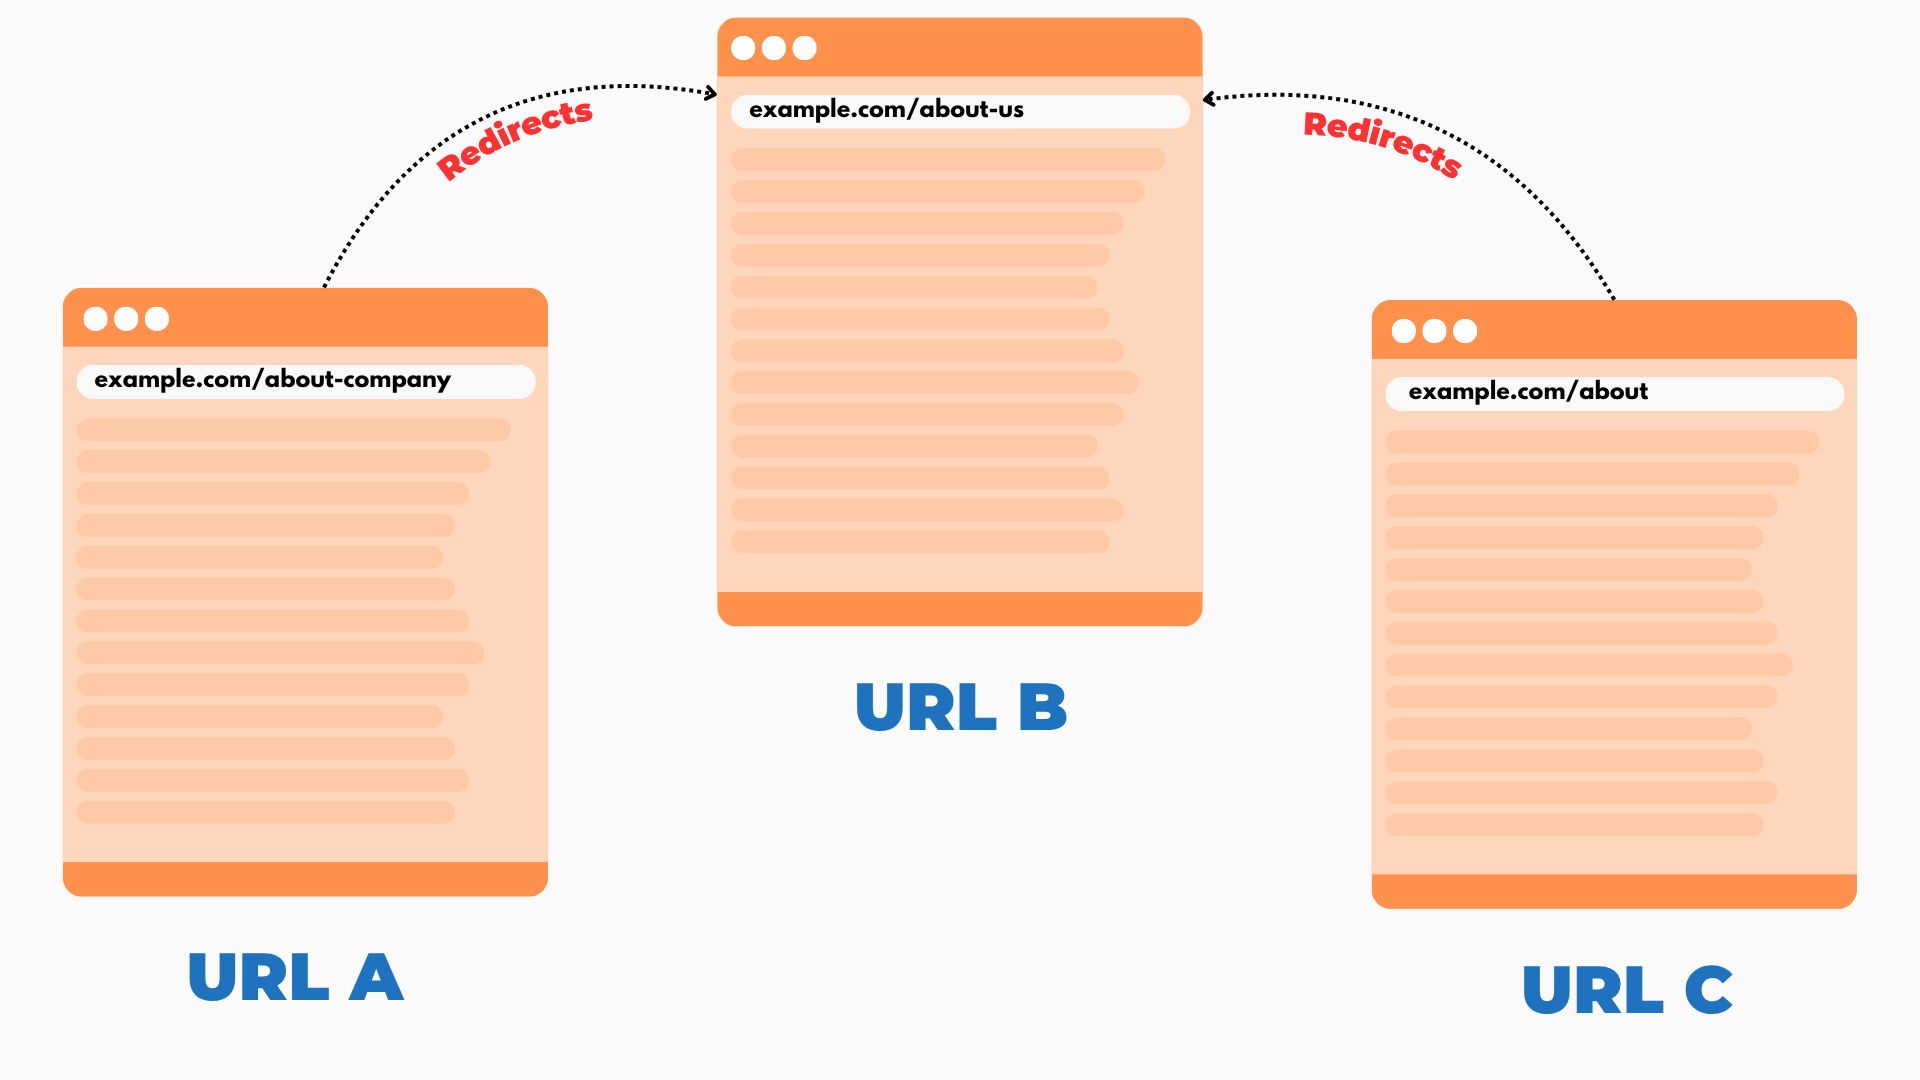
A redirect chain happens when one URL redirects to another, which then redirects to another, and so on.
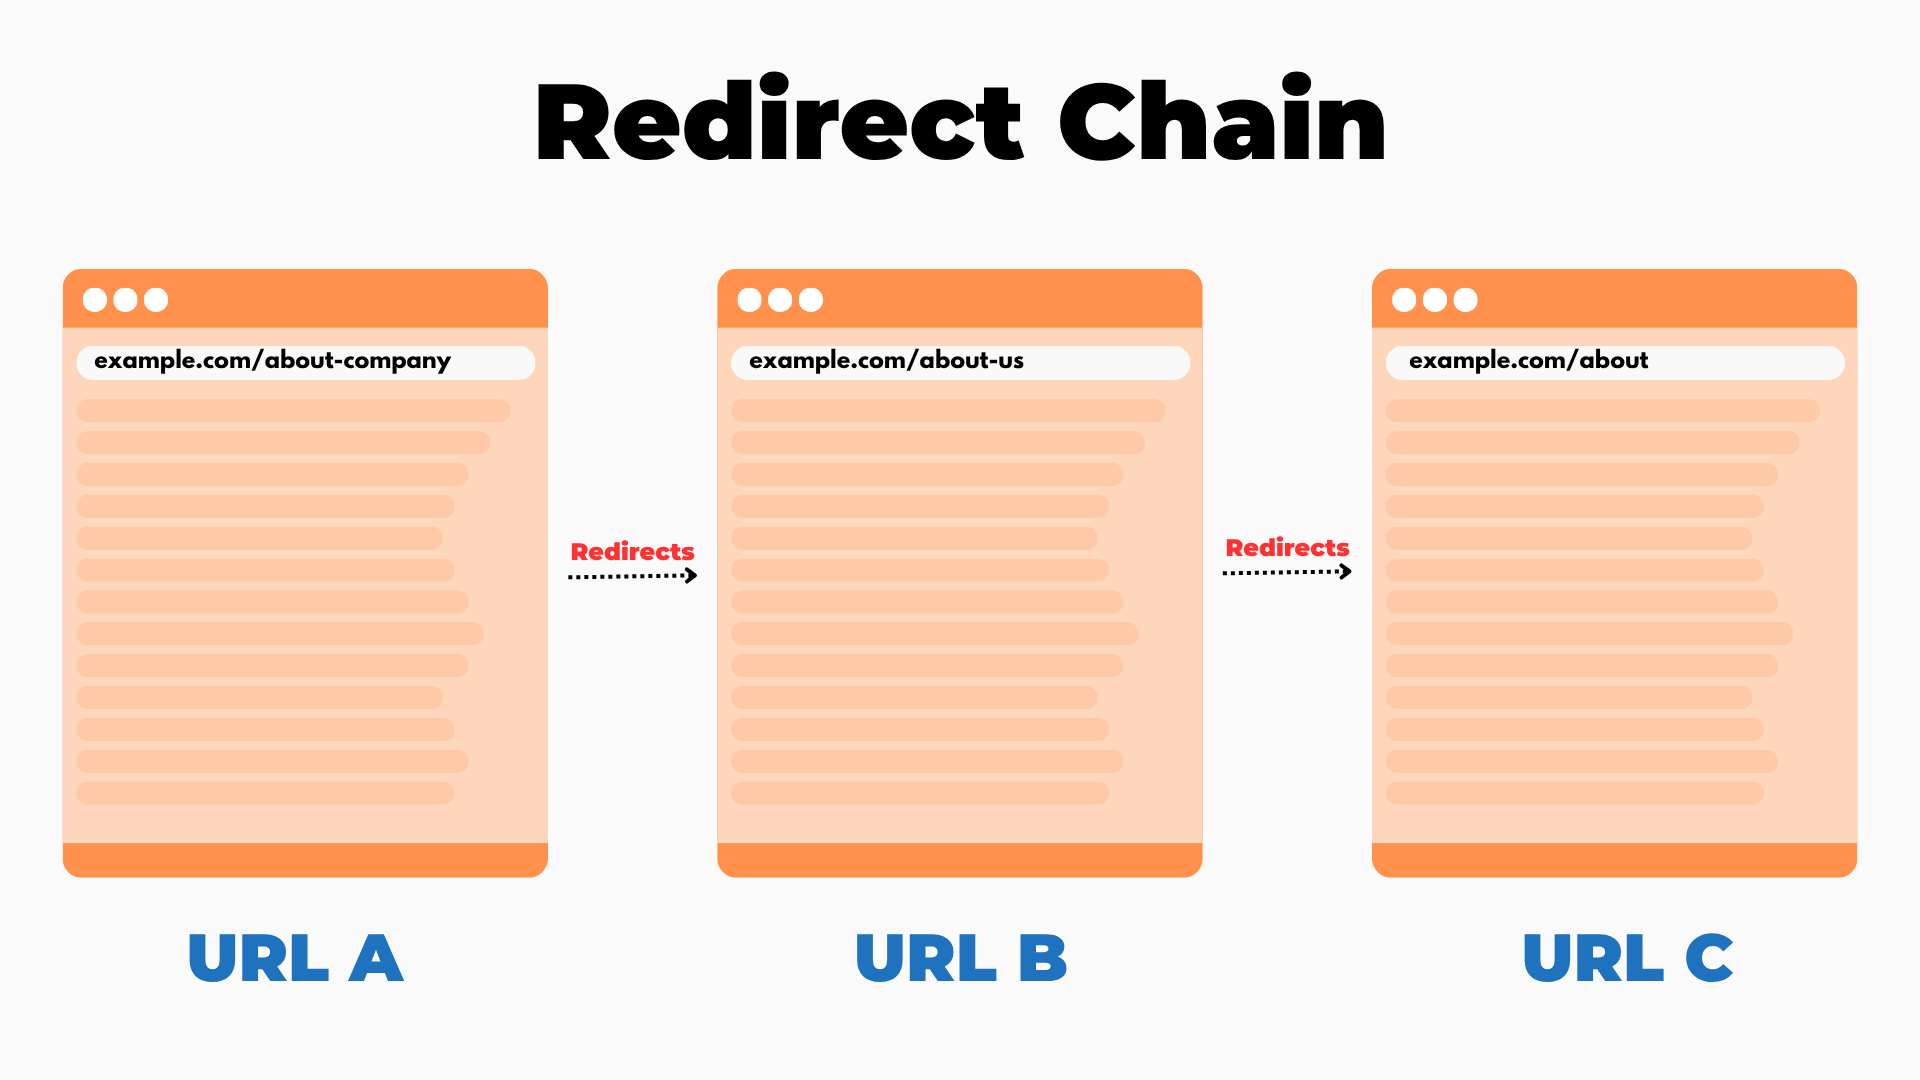
Example of a Redirect Chain:
/old-post.html→ redirects to/updated-post.html/updated-post.html→ redirects to/final-post.html
So, instead of going directly from /old-post.html to /final-post.html, it goes through an extra stop.
Why Redirect Chains Happen?
1. You updated a URL multiple times and added a new redirect each time.
2. You merged blog posts over time and kept stacking redirects.
3. You imported old content from another blog or platform.
4. You didn’t set redirection in Blogger properly.
Negatives of Redirect Chains
1. Slower page load time: Each extra hop adds delay.
2. SEO dilution: Google may not pass full ranking power through long chains.
3. Indexing issues: Search engines may stop indexing your pages, giving an error called “Indexing Request Rejected“.
4. Hard to manage: Over time, it’s confusing to track and maintain.
How to Fix or Avoid Redirect Chains?
- Always redirect to the final version of the URL.
- Audit your redirects every few months.
- Use tools like Google Search Console to find chains.
- Avoid unnecessary steps. One clean redirect is always better than two or three in a row.
- Properly Set Redirection in Blogger.
Redirect Loops in Blogger (My Biggest Mistake)
At one point, I accidentally created a redirect loop. Every time I tried to visit a post, the browser just turned endlessly. It was a nightmare!
What Is a Redirect Loop?
A redirect loop happens when a URL keeps redirecting to itself or back to another URL in the same cycle. It never reaches a final destination.
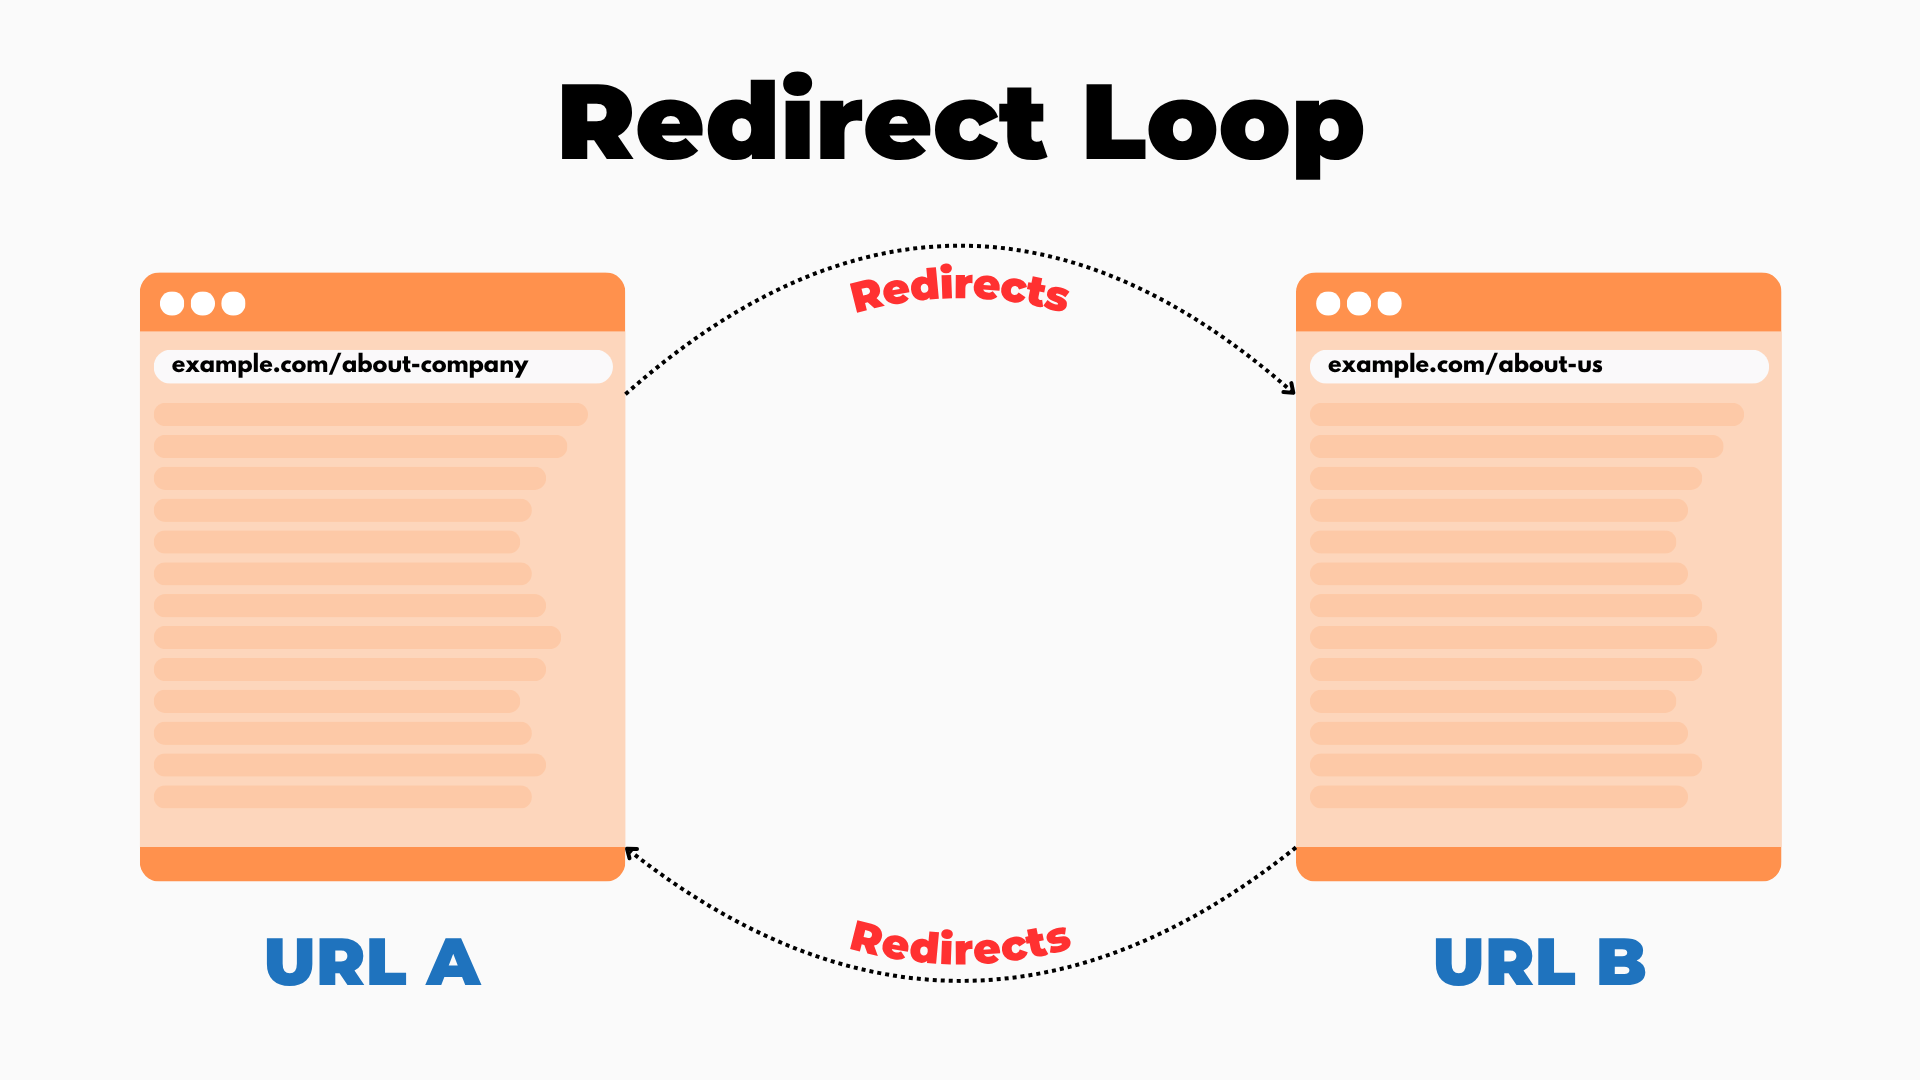
Example of a Redirect Loop:
/page-one.html→ redirects to/page-two.html/page-two.html→ redirects back to/page-one.html
The loop keeps going forever. The browser eventually gives up and shows an error.
Why Redirect Loops Happen?
- You accidentally redirect a page to itself.
- You set up two pages redirecting to each other.
- Misconfigured custom redirects (especially in bulk).
Negatives of Redirect Loops
- Site becomes unusable: Users can’t access your pages.
- Search engines stop crawling your site.
- Google may deindex the looped pages.
- Frustrates users and destroys trust.
How to Avoid Redirect Loops?
- Double-check all your custom redirects.
- Avoid redirecting a page to itself, even accidentally.
- Use tools like Screaming Frog, Ahrefs, or Google Search Console to scan for loop errors.
- Test each redirect manually in your browser.
Learning How to Set Redirection in Blogger
After realizing the impact of broken links, I jumped on a mission to learn how to set up redirects in Blogger. Here’s what I discovered.
Setting Up Custom Redirects in Blogger
1. Access Blogger Dashboard: Log in to your Blogger account and select the blog you want to work on.
2. Navigate to Settings: On the left-hand menu, click on ‘Settings.’
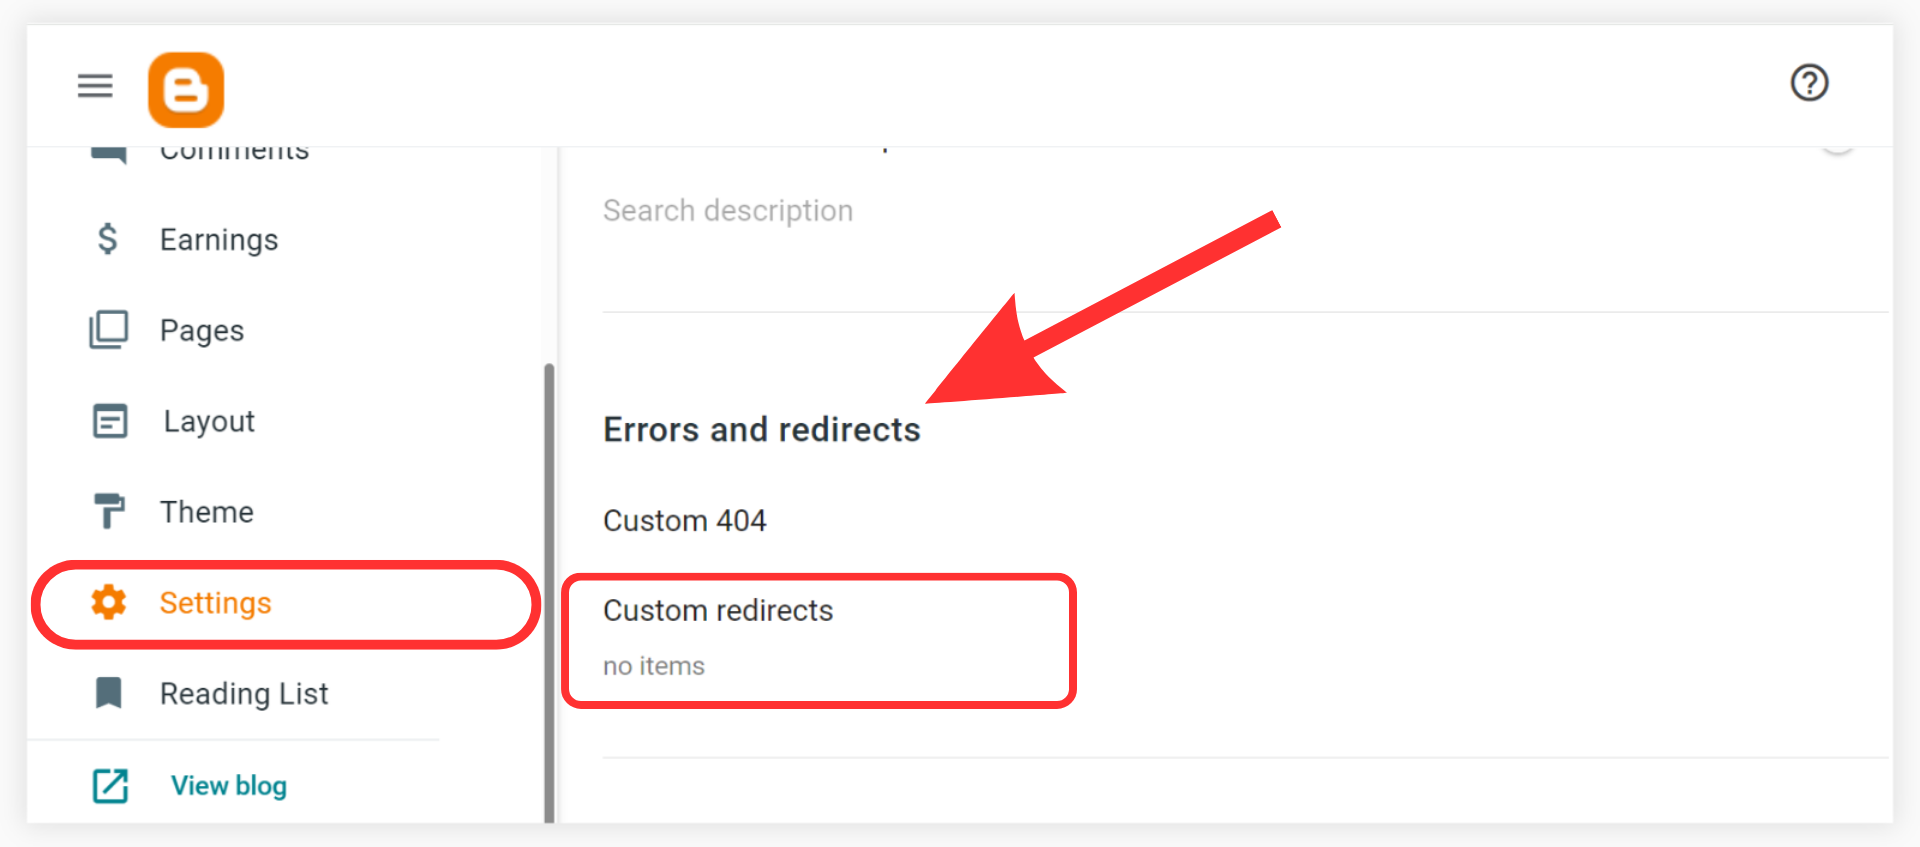
3. Scroll to Errors and Redirects: Under the ‘Errors and Redirects’ section, click on ‘Custom Redirects.’
4. Add a New Redirect:
- Click on ‘New Redirect.’
- In the ‘From’ field, enter the path of the old URL (e.g.,
/2021/05/old-post.html). - In the ‘To’ field, enter the path of the new URL (e.g.,
/2023/08/new-post.html). - Check the box labeled ‘Permanent’ to indicate a 301 redirect.
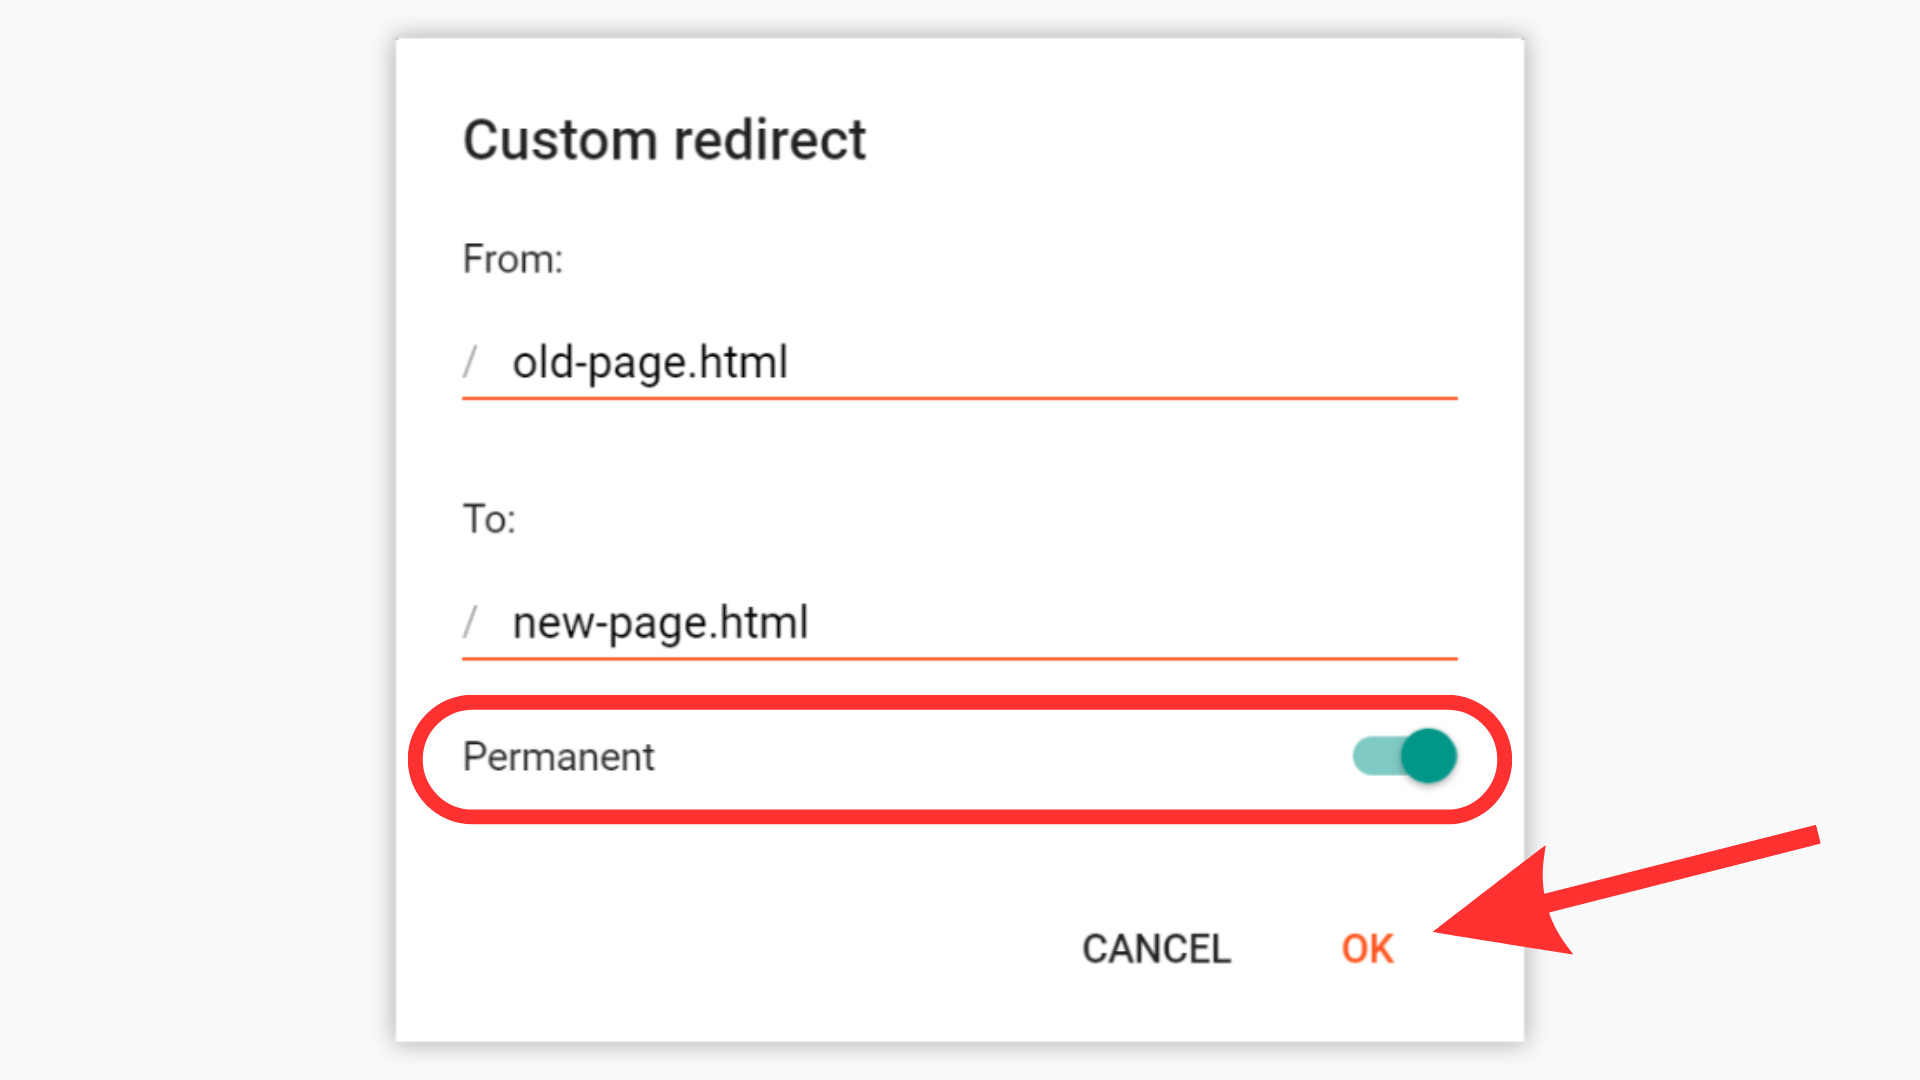
5. Save Changes: Click ‘Save’ to apply the redirect.
Note: Ensure that you only enter the relative paths, not the full URLs.
Advanced Techniques: Redirecting to External URLs
Blogger’s built-in redirect feature only supports internal redirects. However, if you need to redirect to an external site, you can use a JavaScript Redirection.
How to Implement a JavaScript Redirection?
To Set Redirection in Blogger for your entire Blog, use this code:
<script type='text/javascript'>
  var d='<data:blog.url/>';
  d=d.replace(/.*\/\/[^\/]*/, '');
  location.href = 'https://example.com'+d;
</script>
Replace https://example.com with the external Blog URL.
Note: This will redirect your entire Blog to the external Blog URL.
To Set Redirection in Blogger for particular URLs, you can use this code:
<script>
if(window.location.href === "https://yourblog.com")
{
window.location="https://example.com";
}
</script>
Replace https://yourblog.com with your URL and https://example.com with the external Blog URL.
How to Implement a Meta Refresh Redirect?
Meta Refresh Redirect will refresh and redirect your site after the particular seconds edited in the code and Set Redirection in Blogger to an external Blog URL.
1. Access Theme HTML: Go to ‘Theme’ > ‘Edit HTML.’
2. Locate the <head> Tag: Use Ctrl+F to find <head>.
3. Insert Meta Tag: Immediately after the <head> tag, insert the following code:
<meta http-equiv="refresh" content="3;url=https://www.newsite.com/new-post.html" />Replace https://www.newsite.com/new-post.html with your desired URL.
4. Save Theme: Click ‘Save’ to apply the changes.
Note: Use meta refresh redirects sparingly, as they may not pass full SEO value and can affect user experience.
Mistakes to Avoid while Setting Up Redirections
During my learning process, I encountered several errors.
Here’s what to watch out for:
1. Using Full URLs in Redirect Fields: Always use relative paths (e.g., /2021/05/old-post.html) instead of full URLs.
2. Forgetting to Check the ‘Permanent’ Box: This ensures a 301 redirect, which is crucial for SEO.
3. Not Updating Internal Links: After setting up redirects, update internal links to point directly to the new URLs.
4. Overusing Meta Refresh Redirects: Relying too heavily on meta refresh can lead to SEO issues.
Tips for Effective Redirection Management
1. Maintain a Redirect Log: Keep a record of all redirects for future reference.
2. Regularly Audit Your Site: Use tools like Google Search Console to identify crawl errors and fix them promptly.
3. Limit the Number of Redirects: Too many redirects can slow down your site and confuse search engines.
4. Test Redirects: After setting up, test each redirect to ensure it’s working correctly.
Frequently Asked Questions (FAQs)
1. Can I redirect to an external website using Blogger’s custom redirect feature?
No, Blogger’s built-in custom redirect feature only supports internal redirects. To redirect to an external site, you’ll need to use a meta refresh tag in your theme’s HTML.
2. How many custom redirects can I set in Blogger?
Blogger allows up to 40 custom redirects per blog. If you need more, consider consolidating content or using meta refresh redirects judiciously.
3. Will setting up redirects affect my blog’s SEO?
A3: Properly implemented 301 redirects help preserve SEO value by passing link equity from old URLs to new ones. However, excessive or improper use can negatively impact SEO.
4. What happens if I don’t set up redirects after deleting a post?
Visitors clicking on the old URL will encounter a 404 error page, which can harm user experience and SEO rankings.
5. How can I test if my redirects are working correctly?
After setting up redirects, try accessing the old URLs in your browser to see if they lead to the new destinations. Additionally, tools like Google Search Console can help monitor crawl errors.
Conclusion
Setting up proper redirects in Blogger is essential for maintaining your blog’s SEO health and providing a smooth user experience.
By understanding and implementing the steps above, you can prevent traffic loss, preserve your search rankings, and ensure that your readers always find the content they’re looking for.
Remember, it’s not just about fixing broken links; it’s about building a robust and user-friendly blog that stands the test of time.